Sunday 29 March 2015

Happy Easter Bunting

Happy Easter!! Well nearly...


I thought on this dull Sunday afternoon you might like an explosion of colour to brighten your day. 


Really getting into the whole Easter decorations thing this year. I can't wait for the Easter bunny to visit either. We are all rather excited about the excuse to consume enormous amounts of Easter treats.  I can't get enough of bunnies, daffodils, bunting, Easter wreaths, decorated eggs and wonderful rainbows of colours everywhere I go. Think that with the changing of the clocks and the starting of British Summertime and the lack of any sun around here AND the miserable windy rainy day we are having today splashing colour around my home seems like a great idea. 


I have even created my first ever mini crochet tutorial for my Happy Easter Bunting!! It is really easy peasy so hopefully easy to follow.


I used a 4mm hook and scraps of Drops Love You 5 and Drops Paris both 100% cotton yarn in Aran weight to create my bunting. It is an easy peasy pattern and therefore I think any DK or Aran weight yarn will do fine, scraps are perfect and spring colours make it even cheerier.  Each triangle measures 10cm from the top corner to corner.

***If you would like to have a go at making some of my Happy Easter Bunting please please write me a comment in the box below and tell me how you got on and pop over to my Facebook page and if you like what you see hit the like button. My pattern is free for you to use and I would really appreciate some feed back. If you have any trouble or would like to ask a question feel free and I will try my best to answer it. Happy Hooking***

My pattern is written in UK crochet terms.

Abbreviations: 
st(s): stitch(es)
sl: slip
ch: chain
dc: double crochet
htr: half treble crochet
tr: treble crochet

To start:

ch 4, join with a sl st to for a ring.

Round 1: working out of the center of the ring.

ch 3 (counts as 1 tr), tr into ring 11 times, join with a sl st to the 3rd ch of the initial 3ch to close the round. (12 st in round)

Round 2: working out of the spaces between the treble crochet stitches of the previous round.

join with new colour by pulling a loop through with hook and ch 3 (counts as 1tr), tr in same space, in each space that follows create 2tr clusters. (24 st in round)

Round 3: Working out of the spaces between each 2tr cluster of the previous round.

join with new colour and ch 3 (counts as 1tr), 2tr in same space, in each space that follows create 3tr clusters. (36 st in round)

Round 4: working in the st at the top of each tr rather than in the spaces this time, except for the 3 corner spaces where you work into the space.

To make a corner space join into a space between two 3tr clusters with new colour and ch 4 (counts as 1 htr and 2ch corner), htr x2 in same space, *htr into next st along, dc into next 9 sts, htr into next stitch, htr x2 into next corner space, ch 2, htr x2 into same space* repeat ** 1 more time. htr into next st, dc into next 9 sts, htr into next st, htr into next corner space and finish off by joining with sl st into the 2nd ch of initial ch2 and fasten off. (66 sts in round)

You should now have a happy little bunting triangle!! :0)


To join bunting triangles together: There are many ways to do this including threading a ribbon through the corner holes at the top of each triangle. If you would like to crochet these together with a chain stitch like I did here's how to do it...


To start; join yarn into the corner space of one of the triangles, right side facing you. 2x dc in same space, dc into each stitch until you come to another corner space then 2dc into the corner space, chain 4 as a spacer between the triangles (this can of course be more or less chain stitches to suit you), 2dc into the corner space of the next triangle and carry on this way until you have a line of bunting.


My bunting was roughly 98cm long.


Hope you enjoyed your visit today! Look forward to seeing you soon,

Sarah xx

Saturday 28 March 2015

Rust Dyeing Is So Much FUN!!

So so pleased to finally be here! The Easter holidays!! It is been a busy but fun packed term with lots of highs and a few lows. Really looking forward to having some quality time with my little people and getting out an about over the next couple of weeks. Last half term holiday was filled with sickness bugs and illness so I am making up for lost time this holiday. Can not wait!!

I have been playing again. This time with rust! I hadn't tried this before either so new experiences too. A couple of weeks ago I helped to organise a workshop at school with two local textile artists, Sue Cranwell and Madelaine Nightingale who are lovely lovely ladies with the most incredible talent, knowledge and skill. They really are an inspiration and luckily for us very happy to share their knowledge and experience. They demonstrated how to rust dye and bag dye with Procion dyes during the workshop. Since then I have been on a constant look out for rusty objects and rooting through my fabric stash again to select bits and bobs for dyeing. It has proved to be really addictive...


Rust dyeing is very easy too. Everything you need, if you're anything like me, is either in your garden, shed or garage and in your kitchen. A few rusty items, old tools, washers, screws and nails, bits of rusty old tin that can be broken into tiny fragments, vinegar and tea. We used fruit tea as well. Anything acidic will do.


We experimented with rust dyeing on paper and fabrics. The image below was achieved using wire wool placed on paper then painted with tea. The photo doesn't really do it justice but up close you can see tiny hair like dye marks on the paper from the fragments of wire wool that scattered as I was working with to separating the fibres (if you can call them that) to create a fine mesh to lay on the paper.


Next was placing rusty items onto paper and painting them with fruit tea to make prints.... I left these for a couple of days. Quite pleased with the outcome.


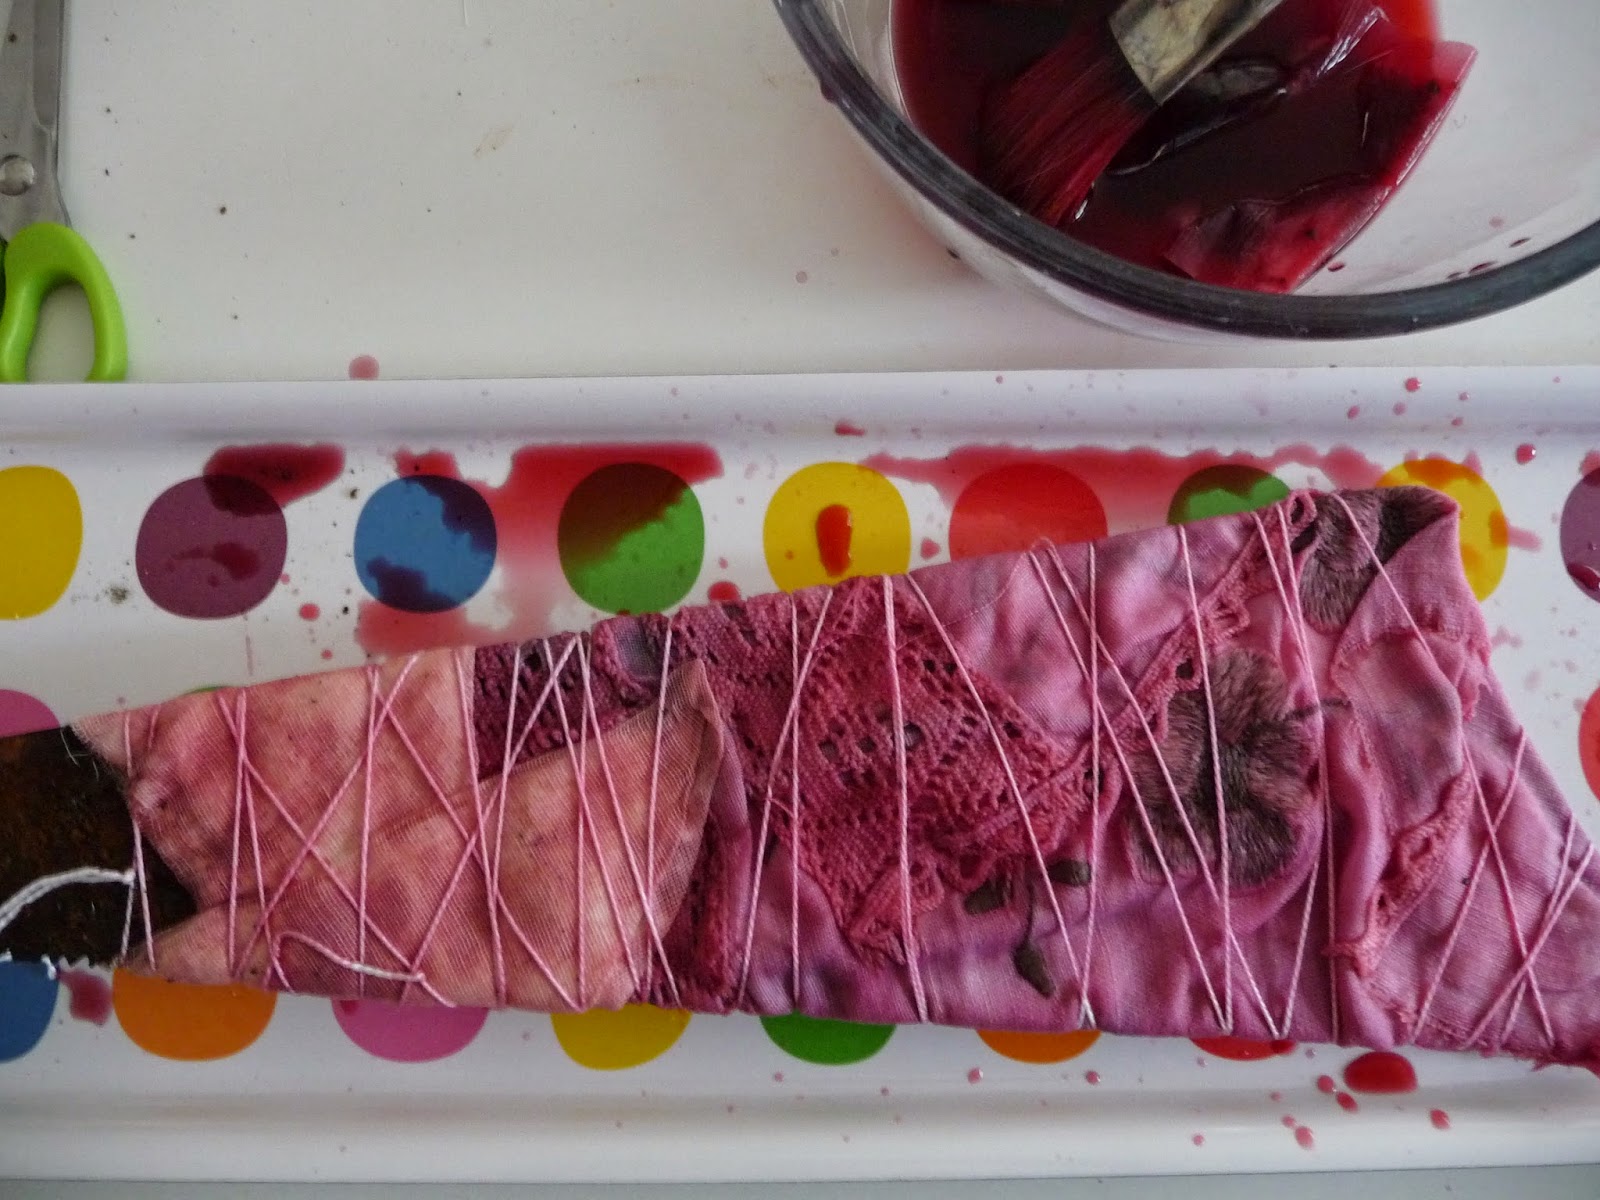
This is dyeing with cranberry and orange fruit tea. I wrapped fabrics around a rusty old saw blade and tied them up. Then painted the whole thing with fruit tea. The fabric that was more absorbent achieved the better results. It is all about making marks and pretty hard to predict exactly what mark you will achieve. The best part is seeing the results at the end. This was the before...


And this was the after... The lovely cerise colour turns a blueberry before it finally turns grey. Some interesting marks on this piece and it would make a great background for future work, plus I love the colours.


Here are some of the most successful pieces I have made. This one was dyed with tea. Lovely Hubby went out and got me some value tea bags from Tesco for 90p. I used about 4-5 tea bags in a measuring jug half full of boiling water and stewed for a while.  I was really pleased with this one. I roughly wrapped the fabric around an old garden tool and tied it up well. Then painted the whole piece with tea. 


Here is another fruit tea dyed piece... I am having ideas about this one, layering print with hand stitch and perhaps a bit of applique. It looks quite like a landscape already. 


Dying with vinegar here achieves the wonderful orange and brown marks. Vinegar dyed shibori with screws on silk.


 Tea dyed shibori with screws on cotton, worked really well. 


And here is a lovely new pile of fabrics waiting to be printed during the next workshop. 


I am starting to build up a huge stash of these dyed fabrics. I would love to create something with them. Still feeling inspired by what I saw at the Textiles In Focus exhibition. I am thinking I might have to start playing with ideas. Have an evening on my sewing machine or play with some print ideas and see what we get. They are such lovely pieces I will need to be very brave to chop, print, collage, stitch or even over dye to build up some ideas for turning these into something.

Thank you for coming by. Have a wonderful Easter break everyone!!

:0) xxx


Saturday 21 March 2015

Mothers Day Treats... Feeling Loved!

Warning: Mothers Day treats and cuteness ahead...


Here is my Little Miss Lovely being the perfect Mummy to her dolly. And Oh how she loves her dollies. They get more kisses than me!

The Little People did me proud this year. I was woken on Mothers Day morning by the sound of Little Man's latest noisy toy in my ear and a big grin as he presented me with a cute card. Little Lady was there ready to give me a wonderfully dribbly kiss. Then there was the compulsory 321 jumps on Mummy from a great height several times. Although I should point out this happens every morning. No need for an alarm clock in our house. At breakfast more treats were given including chocolate (no photo available for obvious reasons), the offer to help me eat the chocolates there and then, lovely flowers...


(Please excuse the rust stained table, I will explain soon. 
A new table might have been a good present too!)
 
... and even more beautiful homemade cards from the Little People. Love these most of all.


This was Little Man's handy work.  Like looking in the mirror!


And Little Lady also created a masterpiece... Such a lucky Mummy!!


I was treated to a bracing stroll along the Felixstowe Promenade and as usual Little Man was zooming along on his scooter while Little Lady enjoyed the shelter of her pushchair. Throughout the day Little Man made a fuss of me making me treats and being extra diligent. Here is a hammer and pin tack picture he made for me. He was understandably very proud of it. Clearly a description here is not necessary but for those of you who have trouble identifying anatomy this is a face with legs.


We did the rounds and visited the Grannies. Both were very happy with a visit from their Grandchildren and receiving cards, gifts and flowers.  It was a lovely quiet day. A chance to spend time with family and enjoying the little things including the arrival of more yarn for finishing projects and starting new ones. 


I now have all the yarn I need to complete my Drops Nepal Granny Squares blanket.  It has changed shape and is not as big as I had first thought but I am really please with it so far. Loving the colours too. I have made quite a bit of progress since this photo by joining the squares and starting the border. 

Shouldn't be long now until it's finishes! Yay! Just the matter of finishing the border and sorting out millions of little thread... not looking forward to that bit!

Thank you for popping by, hope you enjoyed your stay xxx


Monday 16 March 2015

Slow Progress

Talk about bonkers at the moment. I think it's that nearly the end of term feeling. Everything is happening at once and I can't keep up. Trying to find time to create lovely things isn't happening quite as much as I would like again. I have had fun at some lovely workshops recently which I might just tell you about soon. Otherwise the busyness of everyday this and that has taken over...

I have been making slow progress on some of my projects and several of them just need a couple more evenings and they will be done and dusted. I have some lovely ideas for Little Lady's Rabbit who has a dress now and all limbs attached. I will be sharing that with you soon. I have had to order some more yarn for my Granny Squares blanket. All of the squares are completed now and I have decided to use light beige mix as a border for each square and for joining. I will use beige mix and off white for the edging.

I also had fun in the garden the other day with Little Man and we took some nice pics of my latest bundles of finished and half way there crochet projects...

So here it is...

My Poncho!!!!!


The last three photos were requested by Little Man. Always a fan of Mummy's crochet blankets and now the poncho too. He took this last one. Have to say I'm not a fan of having my photo taken especially when I'm not prepared (looking a bit like I've been dragged though a hedge backwards) but he was proud of it nonetheless.

I am very chuffed with my poncho. Making it was wonderful fun and the Drops Nepal Aran weight  yarn was nice and easy to crochet with. I have enjoyed many an evening snuggled under it crocheting and playing with projects. I used Lucy's colours from Attic24 but my own design although I couldn't help but borrow a few of her lovely ideas too. The Poncho Pattern was from Simply Crochet Magazine and here it is on Ravelry.

Must be off now... thanks for popping by xxxxxxx


Friday 6 March 2015

Textiles in Focus

On the last Sunday of the half term holidays I had a day out with my Mum to the Textiles in Focus fair at Cottenham Village College, near Cambridge.

This was a three day textile fair with an exhibition from textile groups Tin Hut Textiles and Eastern Regional Textile Forum, lectures, demonstrations, workshops and traders stalls including Art Van Go. 

We had a wonderful day out, saw lots, spent too much and treated ourselves to a workshop with artist Mary McIntosh. She demonstrated how to use procion dyes with Manutex paste to create a background fabric for a future project. Procion dyes are the same dyes I used several weeks back to  experiment with Cram Jar Dyeing. See here Trying New Things

Mary showed us how to mix the dyes with Manutex to create an ink that can be used for many different purposes including screen printing and gelli printing. In this workshop we were using the inks with sponge rollers to paint onto the surface of the fabric. She demonstrated this and another method using a small square of lino to scrape the inks across the surface of the fabric to give a different effect. She showed us how to achieve a wide spectrum of colours using just six different colours of procion dyes; warm primary colours and cold primary colours. She also added black so we could dull down the colours to achieve more darker and more subtle shades.

This was my attempt. I like the brights...


I tried to work into it slowly, considering the colours and placement carefully but really I couldn't wait. I added colour after colour, layering them up to create this abstract impression of the image I was working from.


This was my image which bares no relation to the colours and composition on my fabric. I think I prefer mine anyway.


Mary suggested adding more Manutex paste to the inks to give a more diluted lighter shade of colour. I also mixed quite a bit of black into the blue tones to try and create a moody sky. 


These were the palettes. We mixed the colours directly on the palette using the sponge roller. I liked this as you could quite easily have several colours on your roller at any point making for lovely patterns and marks on the fabric.


The palettes were rather beautiful as well. 


When our pieces were complete and ready to dry they needed to be carefully wrapped up in a bin liner and left to dry out in a hot place, like an airing cupboard, for a week. After this time the fabric needs to be washed in a washing machine to remove the Manutex. I used a very small amount of Metapex in a cup inside my machine drum to help remove the Manutex.

Ta-dah.....

Well it doesn't appear to have faded much after washing which is nice. In fact it doesn't look that different really. So I took an arty shot with some daffs to jazz it up a bit :)


And some close ups too...


So many ideas!! We left the workshop buzzing with ideas and thoughts of new possibilities. Love it when that happens. Now I think I will have to do a bit of research and have a think about what to do with this lovely piece of fabric. At the moment I'm thinking about flowers and gardens very much inspired by Mary McIntosh who had printed the names of each flower in her garden in lines across her painted fabric. I like the idea of drawing collections of flowers, insects and birds using machine embroidery. Or perhaps laid out in a nature table style, things collected, found and treasured. We shall have to wait and see.

Here is a link to the artist Mary McIntosh who uses this technique among others in her own work.

Thanks for coming by, come again soon xxxxxxx