Showing posts with label Procion Dyes. Show all posts

Saturday, 28 March 2015

Rust Dyeing Is So Much FUN!!

So so pleased to finally be here! The Easter holidays!! It is been a busy but fun packed term with lots of highs and a few lows. Really looking forward to having some quality time with my little people and getting out an about over the next couple of weeks. Last half term holiday was filled with sickness bugs and illness so I am making up for lost time this holiday. Can not wait!!

I have been playing again. This time with rust! I hadn't tried this before either so new experiences too. A couple of weeks ago I helped to organise a workshop at school with two local textile artists, Sue Cranwell and Madelaine Nightingale who are lovely lovely ladies with the most incredible talent, knowledge and skill. They really are an inspiration and luckily for us very happy to share their knowledge and experience. They demonstrated how to rust dye and bag dye with Procion dyes during the workshop. Since then I have been on a constant look out for rusty objects and rooting through my fabric stash again to select bits and bobs for dyeing. It has proved to be really addictive...


Rust dyeing is very easy too. Everything you need, if you're anything like me, is either in your garden, shed or garage and in your kitchen. A few rusty items, old tools, washers, screws and nails, bits of rusty old tin that can be broken into tiny fragments, vinegar and tea. We used fruit tea as well. Anything acidic will do.


We experimented with rust dyeing on paper and fabrics. The image below was achieved using wire wool placed on paper then painted with tea. The photo doesn't really do it justice but up close you can see tiny hair like dye marks on the paper from the fragments of wire wool that scattered as I was working with to separating the fibres (if you can call them that) to create a fine mesh to lay on the paper.


Next was placing rusty items onto paper and painting them with fruit tea to make prints.... I left these for a couple of days. Quite pleased with the outcome.


This is dyeing with cranberry and orange fruit tea. I wrapped fabrics around a rusty old saw blade and tied them up. Then painted the whole thing with fruit tea. The fabric that was more absorbent achieved the better results. It is all about making marks and pretty hard to predict exactly what mark you will achieve. The best part is seeing the results at the end. This was the before...
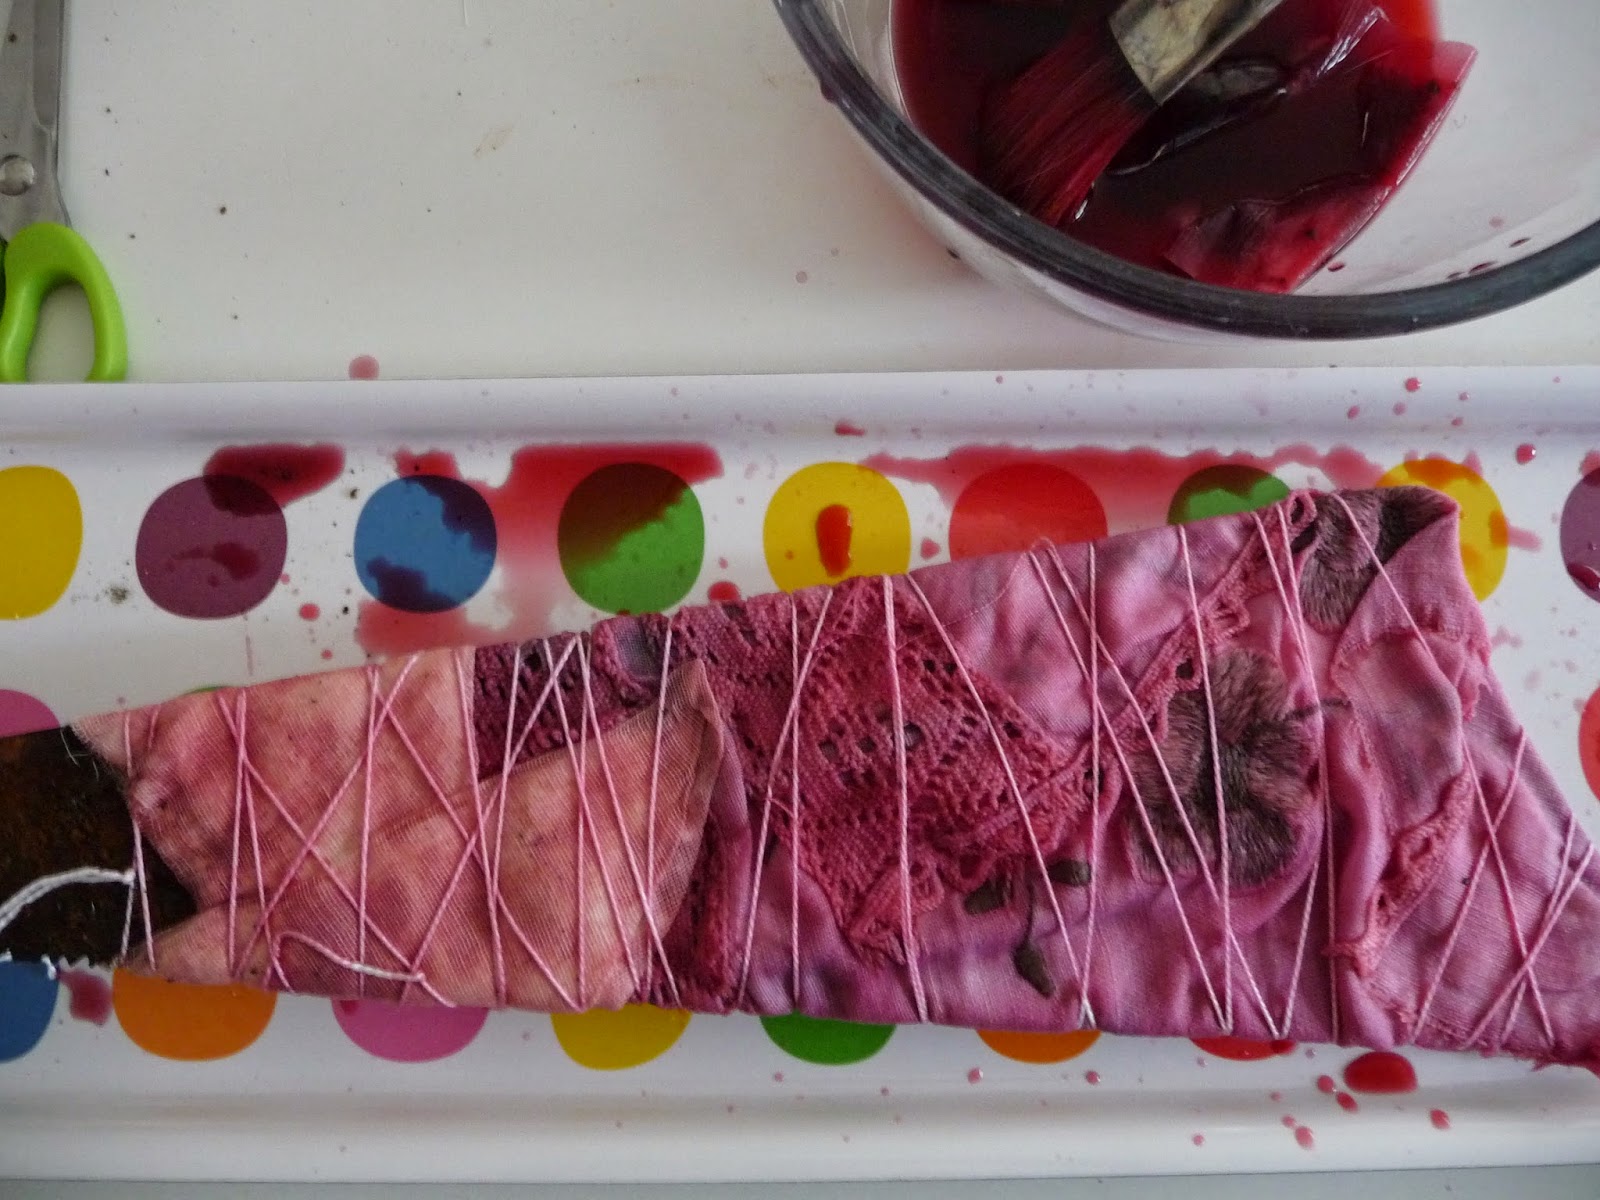

And this was the after... The lovely cerise colour turns a blueberry before it finally turns grey. Some interesting marks on this piece and it would make a great background for future work, plus I love the colours.


Here are some of the most successful pieces I have made. This one was dyed with tea. Lovely Hubby went out and got me some value tea bags from Tesco for 90p. I used about 4-5 tea bags in a measuring jug half full of boiling water and stewed for a while.  I was really pleased with this one. I roughly wrapped the fabric around an old garden tool and tied it up well. Then painted the whole piece with tea. 


Here is another fruit tea dyed piece... I am having ideas about this one, layering print with hand stitch and perhaps a bit of applique. It looks quite like a landscape already. 


Dying with vinegar here achieves the wonderful orange and brown marks. Vinegar dyed shibori with screws on silk.


 Tea dyed shibori with screws on cotton, worked really well. 


And here is a lovely new pile of fabrics waiting to be printed during the next workshop. 


I am starting to build up a huge stash of these dyed fabrics. I would love to create something with them. Still feeling inspired by what I saw at the Textiles In Focus exhibition. I am thinking I might have to start playing with ideas. Have an evening on my sewing machine or play with some print ideas and see what we get. They are such lovely pieces I will need to be very brave to chop, print, collage, stitch or even over dye to build up some ideas for turning these into something.

Thank you for coming by. Have a wonderful Easter break everyone!!

:0) xxx


Friday, 6 March 2015

Textiles in Focus

On the last Sunday of the half term holidays I had a day out with my Mum to the Textiles in Focus fair at Cottenham Village College, near Cambridge.

This was a three day textile fair with an exhibition from textile groups Tin Hut Textiles and Eastern Regional Textile Forum, lectures, demonstrations, workshops and traders stalls including Art Van Go. 

We had a wonderful day out, saw lots, spent too much and treated ourselves to a workshop with artist Mary McIntosh. She demonstrated how to use procion dyes with Manutex paste to create a background fabric for a future project. Procion dyes are the same dyes I used several weeks back to  experiment with Cram Jar Dyeing. See here Trying New Things

Mary showed us how to mix the dyes with Manutex to create an ink that can be used for many different purposes including screen printing and gelli printing. In this workshop we were using the inks with sponge rollers to paint onto the surface of the fabric. She demonstrated this and another method using a small square of lino to scrape the inks across the surface of the fabric to give a different effect. She showed us how to achieve a wide spectrum of colours using just six different colours of procion dyes; warm primary colours and cold primary colours. She also added black so we could dull down the colours to achieve more darker and more subtle shades.

This was my attempt. I like the brights...


I tried to work into it slowly, considering the colours and placement carefully but really I couldn't wait. I added colour after colour, layering them up to create this abstract impression of the image I was working from.


This was my image which bares no relation to the colours and composition on my fabric. I think I prefer mine anyway.


Mary suggested adding more Manutex paste to the inks to give a more diluted lighter shade of colour. I also mixed quite a bit of black into the blue tones to try and create a moody sky. 


These were the palettes. We mixed the colours directly on the palette using the sponge roller. I liked this as you could quite easily have several colours on your roller at any point making for lovely patterns and marks on the fabric.


The palettes were rather beautiful as well. 


When our pieces were complete and ready to dry they needed to be carefully wrapped up in a bin liner and left to dry out in a hot place, like an airing cupboard, for a week. After this time the fabric needs to be washed in a washing machine to remove the Manutex. I used a very small amount of Metapex in a cup inside my machine drum to help remove the Manutex.

Ta-dah.....

Well it doesn't appear to have faded much after washing which is nice. In fact it doesn't look that different really. So I took an arty shot with some daffs to jazz it up a bit :)


And some close ups too...


So many ideas!! We left the workshop buzzing with ideas and thoughts of new possibilities. Love it when that happens. Now I think I will have to do a bit of research and have a think about what to do with this lovely piece of fabric. At the moment I'm thinking about flowers and gardens very much inspired by Mary McIntosh who had printed the names of each flower in her garden in lines across her painted fabric. I like the idea of drawing collections of flowers, insects and birds using machine embroidery. Or perhaps laid out in a nature table style, things collected, found and treasured. We shall have to wait and see.

Here is a link to the artist Mary McIntosh who uses this technique among others in her own work.

Thanks for coming by, come again soon xxxxxxx


Friday, 23 January 2015

Trying New Things.

My poncho is nearly finished. I had a little disaster and ran out of wool but have ordered more to finish off the edging. It is quite a lucky thing really. I had been looking at the yarn I had left thinking about how I would finish it off and sadly realising that I wouldn't be able to have the big band of grey/blue, apparently called light grey green!! I also wouldn't be able to do a bobble edging of any sort. Now I have 2 more balls of yarn coming my way and will finish it off very soon. In the mean time here is a sneak preview....


It is as lovely, warm and blankety as it looks and I really do recommend making one. It has been such a quick project to do and very easy to make. Wearing it will be nice but I will miss making it.


And onto the next big project....Yes, this is a rather lovely pile of vintage linen and fabric bits and bobs crying out for some colour and creativity!


Firstly, perhaps now would be a good time to explain that I really do have a terrible addiction.
I LOOOOOOVE charity shops. Not just charity shops but all the things you find in charity shops; fabrics, buttons, yarn, zips, beads, interesting and unusual items, vintage and retro clothing, jewellery and furniture, bric-a-brac (I actually just love the term bric-a-brac), lovely preloved wooden toys, booooooooks, the list will go on and on and on. This is where I go to find wonderful treasures like these...


When I know I am going out and about I usually try really hard to work out how I can shoehorn in a trip to the nearest charity shop. I have my favourites too. The ones that I have to go to at least once a week especially as I know I have family and friends who also quite like a trip out to a charity shop and will tell me with glee what wonderful finds they have unearthed while I sit with green envy. I even have secret bestest charity shops. The really good ones that I only tell my most favourite people about for fear that word will get out and cause a stampede of vintage hungry shoppers. I have a sneaky suspicion that some of my friends and family also have secret bestest charity shops that they keep secret from me too.

My lovely fella does not have an addiction to charity shops. He is not amused when I arrive home with an armful of lovely shiny treasure to fill up our house. He does not get excited when I say shall we have a look at all the lovely things I have found today. No he does not. So on a recent shopping trip I was really rather surprised to find him burning pushchair tyre marks into the pavement as he whizzed around charity shop after charity shop filling his arms with lovely finds. I could barely keep up with him. Interesting! Clearly very contagious.

So, back to trying new things! A very long time ago I bought a set of dyes called Procion MX dyes from Art Van Go. I had never used these dyes before and after reading the instructions I wasn't quite so keen. There was lots of suggestion that it is quite a lengthy, timely process and required lots of other things like Urea? Soda Ash? Scouring the fabric to remove the sizing? They have sat in a box waiting to be used until now!!!


I have been doing a bit of research on Youtube and have found some lovely tutorials. Apparently there are lots of ways to use this type of dye and not all of them require hours of your time. I am all for instant results. I am going to give cram jar dyeing a go. The idea is that you mix up a 2 or 3 colours of dye in small amounts and work the dye and fabric in layers of both by cramming them into a jam jar. Leave them for half an hour or so or even over night if you can wait that long. The results should be a mottled effect where the colours have mixed into one another. Ooooh the ideas!!!


The method I used was a little experimental as it was my first time. Procion MX dyes only work on natural fibres. I washed the fabrics in the washing machine, normal 30o wash, with soda crystals bought from Tesco. I'm not entirely sure this is the best way to clean the fabrics to remove the sizing but it's worth at try. Then put the fabric bits and bobs in water to keep them soaking.


I prepared six jam jars with lids. Three with a mixture of: 1 table spoon of soda ash, 1 tea spoon of urea, 1/2 tea spoon of Procion MX dye powder. I mixed in 100ml of hot water (not boiling) to dissolve the mixture, adding it a bit at a time. I used an old paint brush to mix it with. Gloves and a decorators breathing mask is apparently a good idea as the dye powder is quite toxic.


Soda ash works as a dye fix..


Urea helps the dye work into the fabric..
 

I used the dye colours turquoise, lemon and magenta.


Ta dah.....


I put the lids on the jars, left them all night and just opened them this morning. So exciting!!!  Like unwrapping a wonderful surprise present. Oh the glee as I opened a jar spilling out wonderfully coloured bits of fabric. The colours changing and patterns emerging. Some lovely mottled patterns. Every piece of fabric has taken the dye differently. The colours have mixed together beautifully giving some really exciting patterns... I wasn't entirely sure whether all my fabrics were 100% natural fibre and you can see the fabrics that might have some man-made fibres in them but even these have taken the dye to a degree.  Now I really can't wait to get stitching into these. Soooooo many ideas...

I used all the colours in this jar.


I used lemon and turquoise in this jar.


And I used magenta and turquoise in this jar.


Here is a link to the Youtube video I followed for cram jar dyeing: Zart Art - Procion Dye cram jar dyeing technique

Thank you for coming by and hope you enjoyed your visit.

Sarah :) xxxxxxxxxx